If you receive a new Chromebook, it’s important to create a system recovery image if something goes wrong, and a Hard Reset or Power Wash (resetting it to factory settings) doesn’t work.
Create Chromebook Recovery Drive
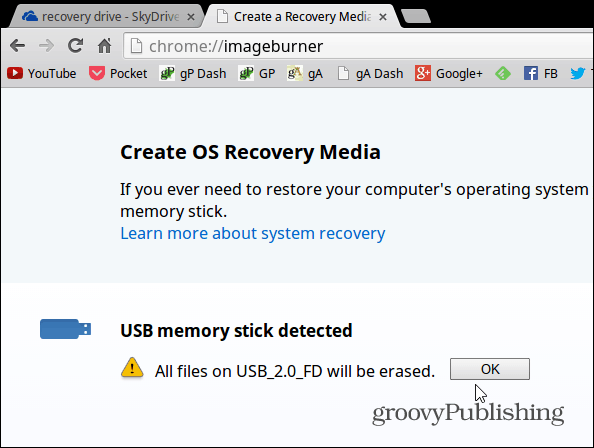
Grab a USB flash drive or SD card that’s 4GB or higher and insert it into one of the open USB slots. Then open the Chrome browser and type: chrome://imageburner into the address bar to get the following screen. Update 5/28/2019: Google has removed the tool from your Chromebook. Instead, download the Chromebook Recovery Utility from Google. Select the drive you popped into the Chromebook and wait for the recovery image to download.
Select the drive you popped into the Chromebook and wait for the recovery image to download, and the recovery drive is created.
That’s it! Provided everything went the way it should, you’ll see the following successful message. Please take out the flash or SD card and keep it in a safe place if you need it at some point.
Recover Your Chromebook
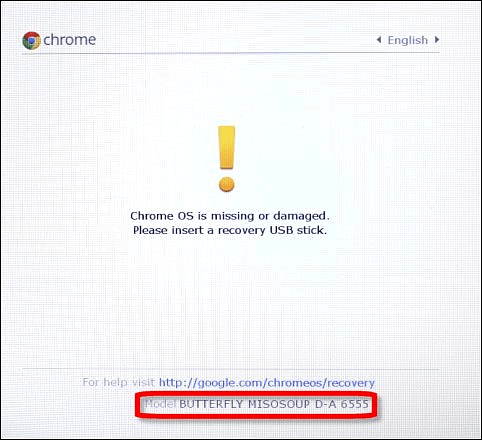
If you’re at the point where you receive an error message saying “Chrome OS is missing or damaged” and haven’t created a recovery drive yet, you still can. You’ll need either a Windows, Mac, or Linux computer and a flash or SD drive that’s at least 4GB in size. You can find the instructions and correct download from this Google Page.
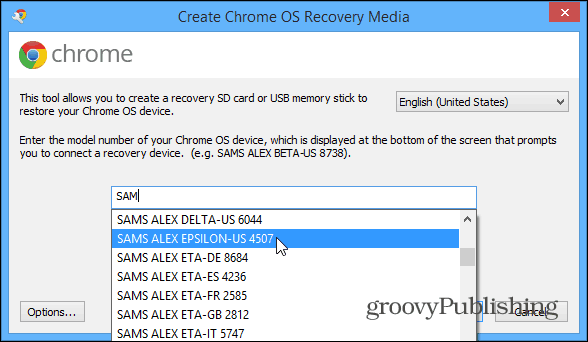
You’ll need to download and run the system and enter the device’s model number with appears at the bottom of the error. Then follow the on-screen instructions.
Bonus Chromebook Tip:
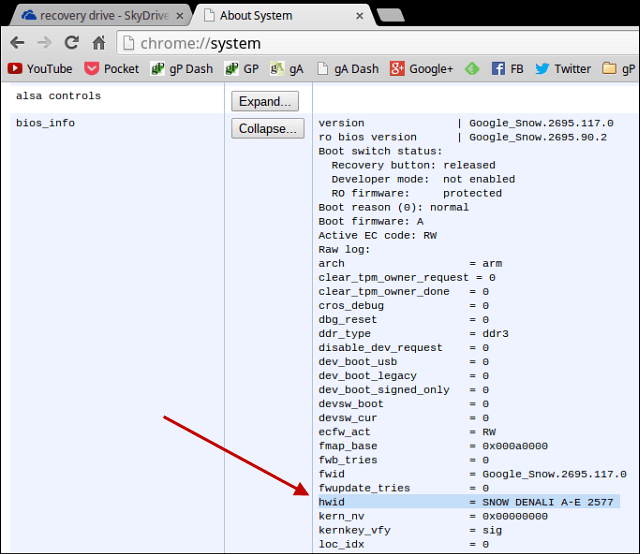
If you want to create a recovery drive using your Windows or Mac computer, you need to find the correct model to enter in the screen above before getting an error message. To do so, type: chrome://system and expand the section called HWID. There you’ll find it – in my example for the Samsung Chromebook 303; it’s SNOW DENALI A-E 2577.
To boot from the USB drive, typically, you’ll need to hold down the Power+Escape+Refresh then go through the recovery. Then some have a hidden recovery button where you need to stick a paperclip in – either on the bottom or next to a USB port. Basically, the only time you’ll need to recover your Chromebook is if you’re messing around in developer mode, but you never know. So making sure to have your recovery drive handy and ready to go, gives you peace of mind, and it’s easy to create. This new way will not work for my chromebook. It keeps freezing at the “writing” stage at 0%.. I have tried 3 different USB drives(all above 4GB). Can’t replace the SD card because there is no SD card for the CB-111 Chromebook model. Turns out I’m not the only one having this problem. Any suggestions? Comment Name * Email *
Δ Save my name and email and send me emails as new comments are made to this post.


![]()
